

WordPress增加在线投稿功能的方法
现在很多站长为了增加网站的内容,都会提供投稿通道,大部分都是以邮箱的形式进行投稿,不过这样一来,也很费人力,要拷贝复制,然后编辑等。如果给博客加个在线投稿功能,那就方便多了。稍微审核下文章内容就可以了。下面介绍一些如何给WordPress博客增加在线投稿功能的方法。
有两个方向:一个是寻找插件,一个是自己动手编写代码。
通过百度和若干WordPress技术网站,我们整理出下面几款。
1、WP User Frontend插件,这是用户中心插件。
功能如下:
用户可以在前台发布文章
用户可以前台查看和管理他们自己的文章
用户可以前台编辑个人资料
管理员可以设置哪些等级的用户才允许访问WordPress后台(/wp-admin)
可以设置用户的新文章状态,例如 已发布、草稿、等待审核等
当用户发布新文章时,邮件通知管理员
设置是否允许用户编辑和删除他们的文章
允许用户发布文章时上传附件
允许用户设置特色图像
管理员可以前台管理用户(添加用户,删除用户等)
支持收费发布文章(设置用户要发布文章是否需要付费)
使用方法如下:
设置你的WordPress固定链接要包含%postname%,插件才生效。
新建一个名为页面“新文章”,添加简码 [wpuf_addpost] 然后发布,这个页面就可以显示用户自己的文章。如果想显示自定义文章类型,比如 event,可以添加简码 [wpuf_addpost post_type=”event”]
新建一个名为“编辑”的页面,添加简码 [wpuf_edit] 然后发布,这个页面就是用来前台编辑文章的。
新建名为“个人资料”的页面,添加简码 [wpuf_editprofile],用来显示和编辑用户个人资料
新建名为“仪表盘”的页面,添加简码 [wpuf_dashboard] 就是前台用户中心主页 。如果要主页显示自定义文章类型的列表,可以使用 [wpuf_dashboard post_type=”event”]
要显示所有的订购发布信息,请使用简码 [wpuf_sub_info]
要显示所有的订购发布套餐,请使用简码 [wpuf_sub_pack]
要编辑用户,插入短代码 [wpuf-edit-users]
对于认购的付款页面,以及付款完后的配置, 在插件设置选项卡上中的“PayMents”选项下进行设置。认购付款页面,创建一个新的页面,并在WP用户前端的“贝宝付款页面”选项插入的页ID。
如果需要良好的现实用户中心页面,可以为WP User Frontend的页面单独定制一个模板,这样可以提供更好的使用体验。
但是这个插件有个最大的麻烦,那就是需要到网站固定连接将你的自定义网址改成%postname%。这是个麻烦的活,微部落博客之前都是用的
%post_id%。这对于老站,不仅工作量大,而且会造成大量的404页面。当然网络上有办法在不改变原始网址的情况下解决这个问题,这里微部落博客不做细述。
2、submit posts插件
这是个极其简单的拥有AJAX效果的投稿插件,没有附加其他任何功能,支持游客投稿,不依赖任何的框架,无需任何设置.
使用方法:解压上传,激活。后台创建一个投稿的页面,在需要插入投稿表单的地方插入[submit_posts]即可,在日志中插入也有效。
可根据你的主题风格,添加CSS样式,使用投稿表单看上去更漂亮。
功能:
投稿到审核状态。
投稿成功后给投稿者发送邮件通知。
但这个插件页面比较简陋,当然他支持CSS,有兴趣的可以自己完善。
3、DX-Contribute插件
DX-Contribute是一个wordpress投稿插件,主要功能如下:
允许游客无需注册即可在你的网站投稿。
灵活的后台设置,可以自定义限定内容输入字数,为投稿的文章指定分类等。
前台内容采用wordpress内置的文章编辑器,简单易用。
该wordpress插件还有很好的验证保护措施,会自动检测标题字数、email格式,并且能够有效控制用户重复投稿。
不过这个插件已经超过两年没有更新了。
当然wordpress投稿插件还有别的,但主要是以上三种,在尝试了三种插件后,微部落博客有找到了不用插件的解决方案:
不用插件用代码解决wordpress网站在线投稿功能
经过几种尝试,微部落博客在露兜博客找到了合适的方法,并经过微调。
步骤如下:
1、找到当前主题目录下page.php,并复制传输到本地电脑,重命名为tougao-page.php。
2、搜索:the_content,可以查找到类似代码<?php the_content(); ?>,在这行代码下面添加表单样式代码:
<form class=”ludou-tougao” method=”post” action=”<?php echo $_SERVER["REQUEST_URI"]; $current_user = wp_get_current_user(); ?>”>
<div style=”text-align: left; padding-top: 10px;”>
<label for=”tougao_authorname”>昵称:*</label>
<input type=”text” size=”40″ value=”<?php if ( 0 != $current_user->ID ) echo $current_user->user_login; ?>” id=”tougao_authorname” name=”tougao_authorname” />
</div>
<div style=”text-align: left; padding-top: 10px;”>
<label for=”tougao_authoremail”>E-Mail:*</label>
<input type=”text” size=”40″ value=”<?php if ( 0 != $current_user->ID ) echo $current_user->user_email; ?>” id=”tougao_authoremail” name=”tougao_authoremail” />
</div>
<div style=”text-align: left; padding-top: 10px;”>
<label for=”tougao_authorblog”>您的博客:</label>
<input type=”text” size=”40″ value=”<?php if ( 0 != $current_user->ID ) echo $current_user->user_url; ?>” id=”tougao_authorblog” name=”tougao_authorblog” />
</div>
<div style=”text-align: left; padding-top: 10px;”>
<label for=”tougao_title”>文章标题:*</label>
<input type=”text” size=”40″ value=”" id=”tougao_title” name=”tougao_title” />
</div>
<div style=”text-align: left; padding-top: 10px;”>
<label for=”tougaocategorg”>分类:*</label>
<?php wp_dropdown_categories(‘hide_empty=0&id=tougaocategorg&show_count=1&hierarchical=1′); ?>
</div>
<div style=”text-align: left; padding-top: 10px;”>
<label style=”vertical-align:top” for=”tougao_content”>文章内容:*</label>
<textarea rows=”15″ cols=”55″ id=”tougao_content” name=”tougao_content”></textarea>
</div>
<br clear=”all”>
<div style=”text-align: center; padding-top: 10px;”>
<input type=”hidden” value=”send” name=”tougao_form” />
<input type=”submit” value=”提交” />
<input type=”reset” value=”重填” />
</div>
</form>
3、在文件头部,添加代码:
<?php
/*
Template Name: 投稿模板
*/
if( isset($_POST['tougao_form']) && $_POST['tougao_form'] == ‘send’) {
global $wpdb;
$current_url = ‘http://www.vprol.com/tougao’; // 注意修改此处的链接地址
$last_post = $wpdb->get_var(“SELECT `post_date` FROM `$wpdb->posts` ORDER BY `post_date` DESC LIMIT 1″);
// 博客当前最新文章发布时间与要投稿的文章至少间隔120秒。
// 可自行修改时间间隔,修改下面代码中的120即可
// 相比Cookie来验证两次投稿的时间差,读数据库的方式更加安全
if ( (date_i18n(‘U’) – strtotime($last_post)) < 120 ) {
wp_die(‘您投稿也太勤快了吧,先歇会儿!<a href=”‘.$current_url.’”>点此返回</a>’);
}
// 表单变量初始化
$name = isset( $_POST['tougao_authorname'] ) ? trim(htmlspecialchars($_POST['tougao_authorname'], ENT_QUOTES)) : ”;
$email = isset( $_POST['tougao_authoremail'] ) ? trim(htmlspecialchars($_POST['tougao_authoremail'], ENT_QUOTES)) : ”;
$blog = isset( $_POST['tougao_authorblog'] ) ? trim(htmlspecialchars($_POST['tougao_authorblog'], ENT_QUOTES)) : ”;
$title = isset( $_POST['tougao_title'] ) ? trim(htmlspecialchars($_POST['tougao_title'], ENT_QUOTES)) : ”;
$category = isset( $_POST['cat'] ) ? (int)$_POST['cat'] : 0;
$content = isset( $_POST['tougao_content'] ) ? trim(htmlspecialchars($_POST['tougao_content'], ENT_QUOTES)) : ”;
// 表单项数据验证
if ( empty($name) || mb_strlen($name) > 20 ) {
wp_die(‘昵称必须填写,且长度不得超过20字。<a href=”‘.$current_url.’”>点此返回</a>’);
}
if ( empty($email) || strlen($email) > 60 || !preg_match(“/^([a-z0-9\+_\-]+)(\.[a-z0-9\+_\-]+)*@([a-z0-9\-]+\.)+[a-z]{2,6}$/ix”, $email)) {
wp_die(‘Email必须填写,且长度不得超过60字,必须符合Email格式。<a href=”‘.$current_url.’”>点此返回</a>’);
}
if ( empty($title) || mb_strlen($title) > 100 ) {
wp_die(‘标题必须填写,且长度不得超过100字。<a href=”‘.$current_url.’”>点此返回</a>’);
}
if ( empty($content) || mb_strlen($content) > 10000 || mb_strlen($content) < 100) {
wp_die(‘内容必须填写,且长度不得超过10000字,不得少于100字。<a href=”‘.$current_url.’”>点此返回</a>’);
}
$post_content = ‘昵称: ‘.$name.’<br />Email: ‘.$email.’<br />blog: ‘.$blog.’<br />内容:<br />’.$content;
$tougao = array(
‘post_title’ => $title,
‘post_content’ => $post_content,
‘post_category’ => array($category)
);
// 将文章插入数据库
$status = wp_insert_post( $tougao );
if ($status != 0) {
// 投稿成功给博主发送邮件
// somebody#example.com替换博主邮箱
// My subject替换为邮件标题,content替换为邮件内容
wp_mail(“somebody#example.com”,”My subject”,”content”);
wp_die(‘投稿成功!感谢投稿!您的文章将在审核通过后发布!<a href=”‘.$current_url.’”>点此返回</a>’, ‘投稿成功’);
}
else {
wp_die(‘投稿失败!<a href=”‘.$current_url.’”>点此返回</a>’);
}
}
?>
4、保存上传到主题目录,然后新建一个页面,用投稿模板
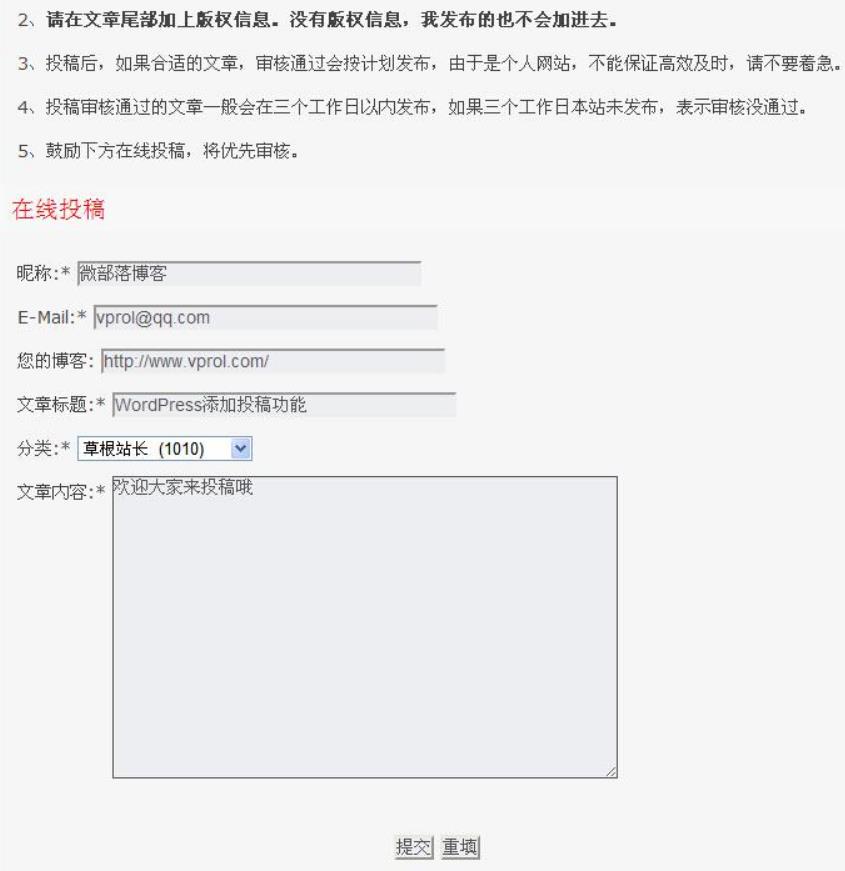
不出意外的话,就OK了,当然你可以逐步调整代码,进一步完善。当然你可以再将功能完善,比如:
好了,实现WordPress添加投稿功能的办法基本如上,希望能够帮到你,另外希望各位有空投个稿给我。
原文链接:https://www.qiquanji.com/post/7018.html
本站声明:网站内容来源于网络,如有侵权,请联系我们,我们将及时处理。
版权声明
本文仅代表作者观点,不代表本站立场。
本文系作者授权发表,未经许可,不得转载。